A stunning backyard doesn’t have to mean a complicated project sometimes the simplest touches make the biggest impact. These 23 simple backyard decor ideas are budget-friendly, easy to pull off, and packed with stylish touches from cozy seating setups to charming string lights and effortless greenery. Here are the best simple backyard decor ideas for easy, effortless style!
If your space is on the smaller side, other easy upgrades worth trying can help you get even more from a compact yard.
String Lights in a Canopy Pattern
String lights arranged in a canopy pattern create a warm and magical atmosphere in outdoor spaces. The overhead lighting adds softness and charm while making the area feel more inviting during the evening. This simple feature instantly enhances patios, gardens, and seating areas.
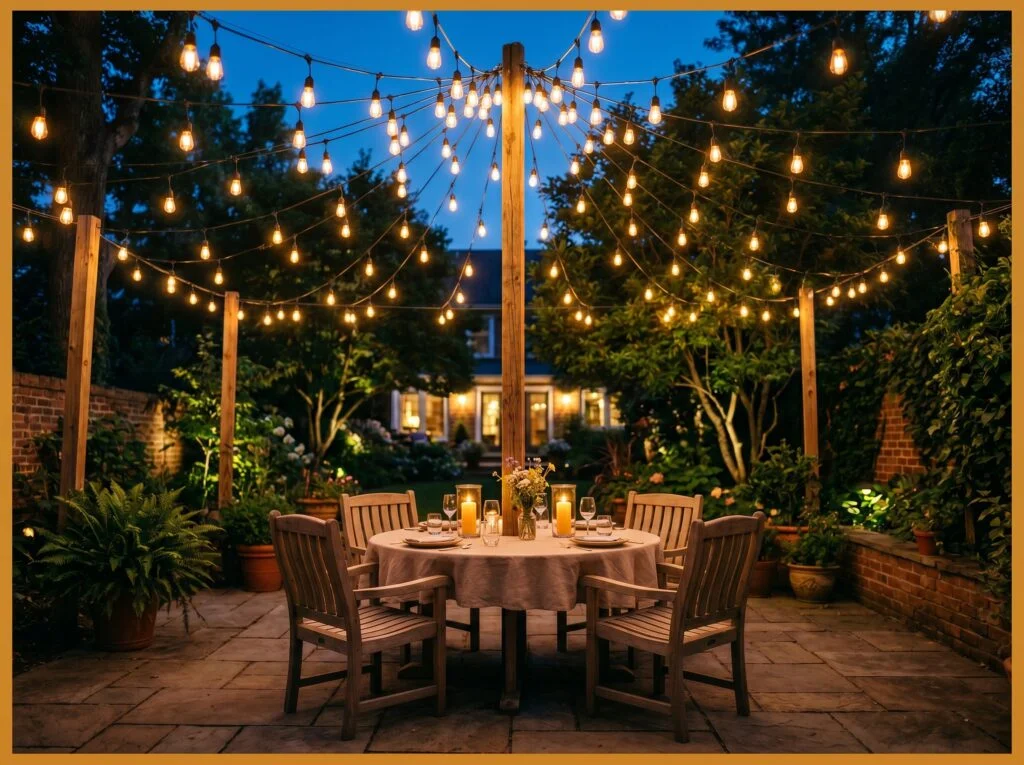
String lights are the single backyard decor upgrade with the highest impact-to-cost ratio available. A set of 48-foot outdoor Edison string lights costs $25 to $60, installs in an afternoon using two wooden posts and some cable clips, and completely transforms a dark, flat patio into an illuminated outdoor room the moment the sun goes down.
The most versatile installation is the canopy pattern running lights from a central high point (a wooden post, a tree branch, or a house eave hook) outward to anchor points at the patio perimeter in multiple directions, creating a grid of light overhead. Space the light strings 18 to 24 inches apart for a dense, rich canopy effect.
Outdoor Area Rug to Define the Seating Zone
An outdoor area rug helps visually define the seating zone and creates a more cohesive layout. The added texture and color make the space feel comfortable and similar to an indoor living room. This decorative element also enhances warmth and style in outdoor settings.
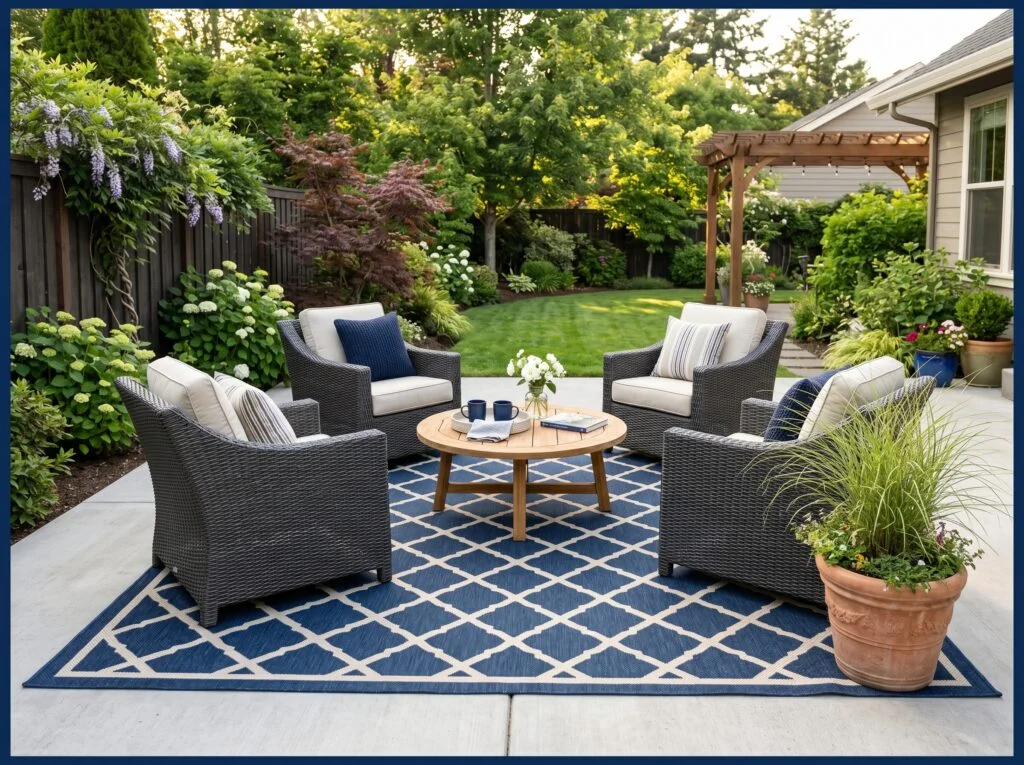
An outdoor area rug is the decor element that most people skip and then immediately wish they hadn’t. Without a rug, patio furniture placed on a concrete slab or wooden deck looks like it was randomly positioned rather than arranged there’s nothing tying the pieces together into a composed grouping.
Choose a rug made from polypropylene or recycled PET fiber both are completely weatherproof, easy to clean with a garden hose, UV-stable for years of sun exposure, and available in a wide range of colors and patterns. Size matters as much as style the rug should be large enough that all four legs of every chair rest on the rug when chairs are in their normal occupied positions.
Container Plants in Terracotta Pots
Container plants in terracotta pots bring natural beauty and timeless charm to outdoor spaces. The earthy tones of terracotta complement a wide variety of flowers, herbs, and greenery. This classic arrangement adds warmth, texture, and seasonal interest to patios and gardens.
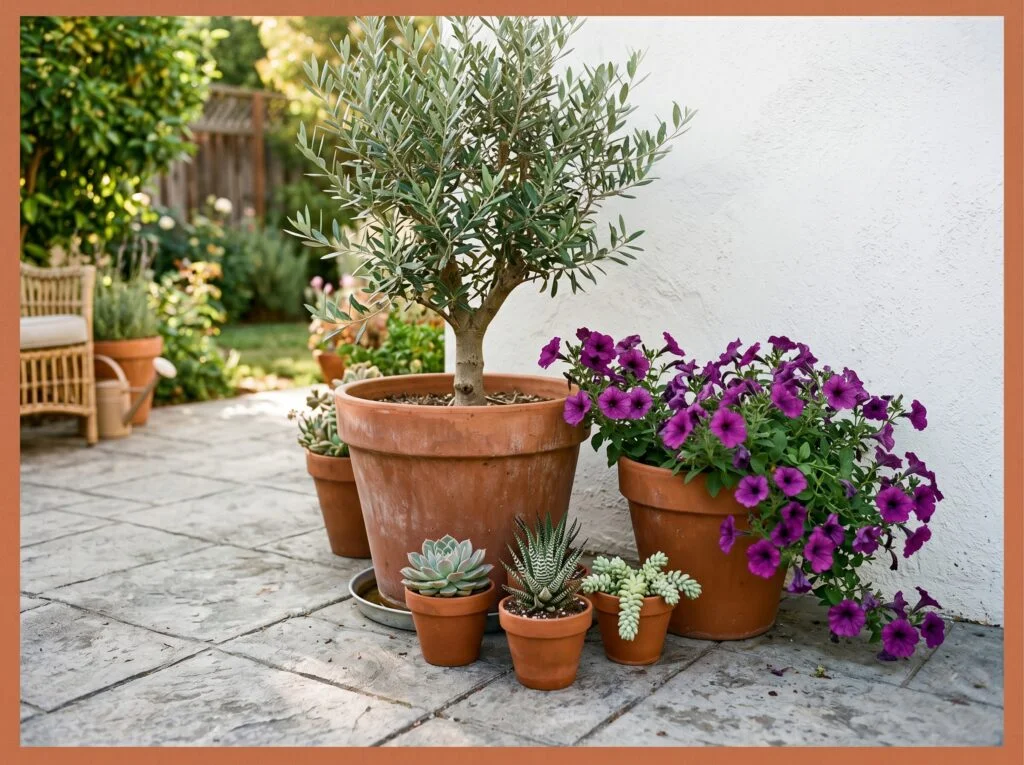
Container plants in terracotta pots are the fastest and most flexible way to add life, color, and warmth to any backyard space. Unlike planted garden beds, containers can be repositioned seasonally, swapped out when plants finish blooming, and taken with you if you move.
Use one taller architectural plant in the large pot (olive tree, ornamental grass, or a standard-form rosemary topiary) for height, one full and colorful blooming plant in the medium pot (petunias, geraniums, or calibrachoa) for seasonal color, and a low-maintenance succulent or herb in the small pot for texture and practicality. This combination covers every visual element height, color, and fine texture in three pots.
Once the pots are styled, greenery that fills out a patio can round out the rest of the seating area.
Solar Path Lights Along Garden Edges
Solar path lights along garden edges improve both safety and ambiance in the landscape. The soft illumination highlights pathways and planting beds while creating an attractive nighttime appearance. These energy-efficient lights provide a practical and decorative outdoor lighting solution.
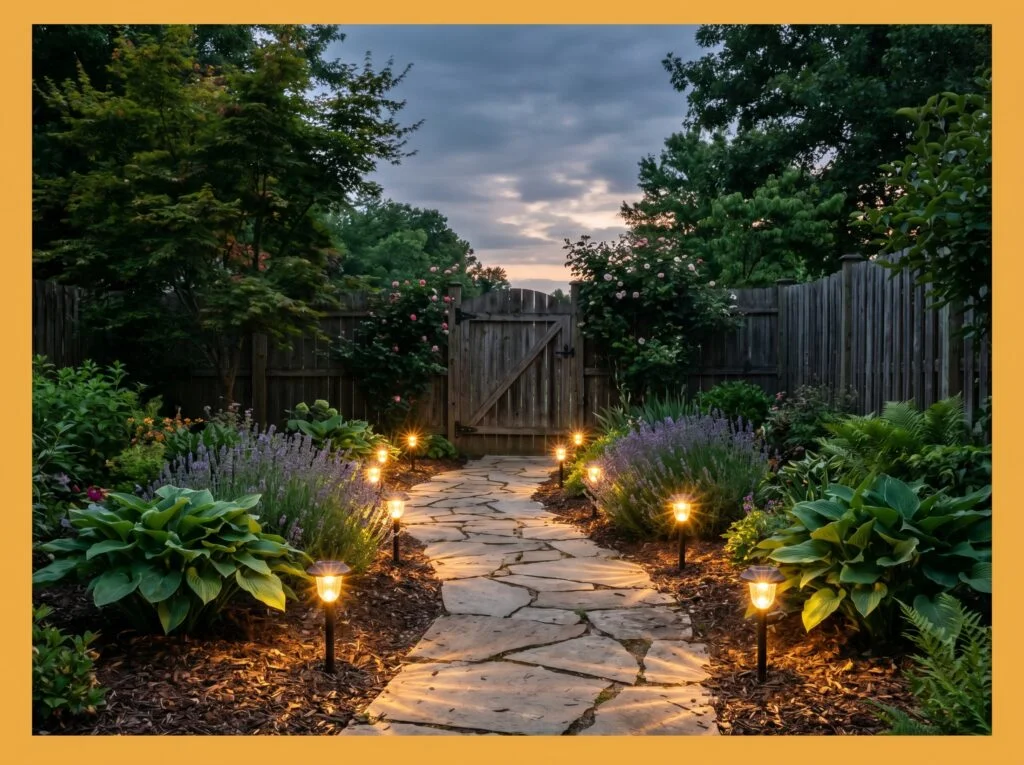
Solar path lights along garden edges and walkways do two things simultaneously they make the backyard genuinely safer to navigate after dark and they create a beautiful, layered lighting effect at ground level that complements any overhead string lights or overhead fixtures.
Choose solar path lights in a warm amber-toned finish hammered copper, aged bronze, or brushed gold for the most visually appealing appearance. Cheap stainless or chrome solar lights look clinical and cold in a garden context. Space them 12 to 18 inches apart for a dense, continuous border effect, or 24 to 30 inches apart for a more open, directional effect.
Simple Wooden Privacy Screen
A simple wooden privacy screen offers a stylish way to create seclusion in outdoor living areas. The natural wood texture adds warmth while helping define different zones within the landscape. This feature creates a cozy and comfortable environment for relaxation.
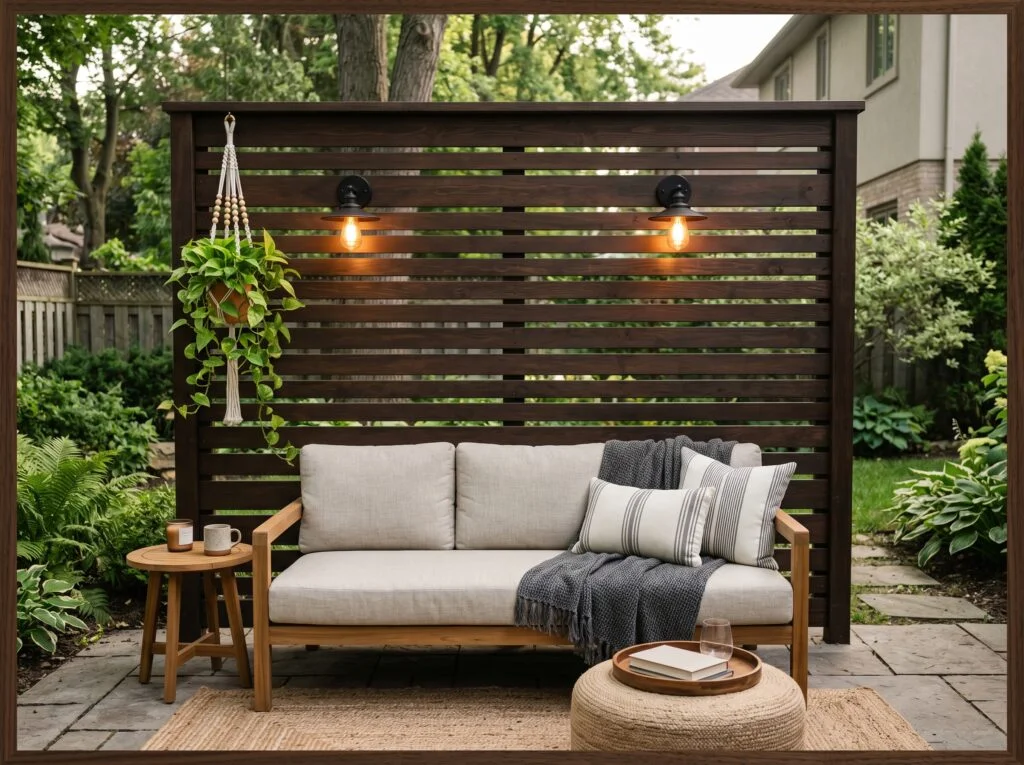
A simple wooden privacy screen behind an outdoor seating area does more design work than almost any other single backyard addition. It creates a visual back wall that turns an open patio into an outdoor room.
Freestanding privacy screen panels (available at most home improvement stores in 4×8-foot or 6×8-foot panels) are the most accessible option they require no digging, no concrete, and no tools beyond basic assembly. Two panels angled in an L-shape or three panels in a U-shape behind a seating area create an immediate sense of enclosure.
Fire Pit as a Backyard Focal Point
A fire pit serves as a beautiful focal point that naturally draws people together in outdoor spaces. The warmth and glow create an inviting atmosphere for gatherings and evening entertainment. This feature adds both functionality and visual interest to the backyard.
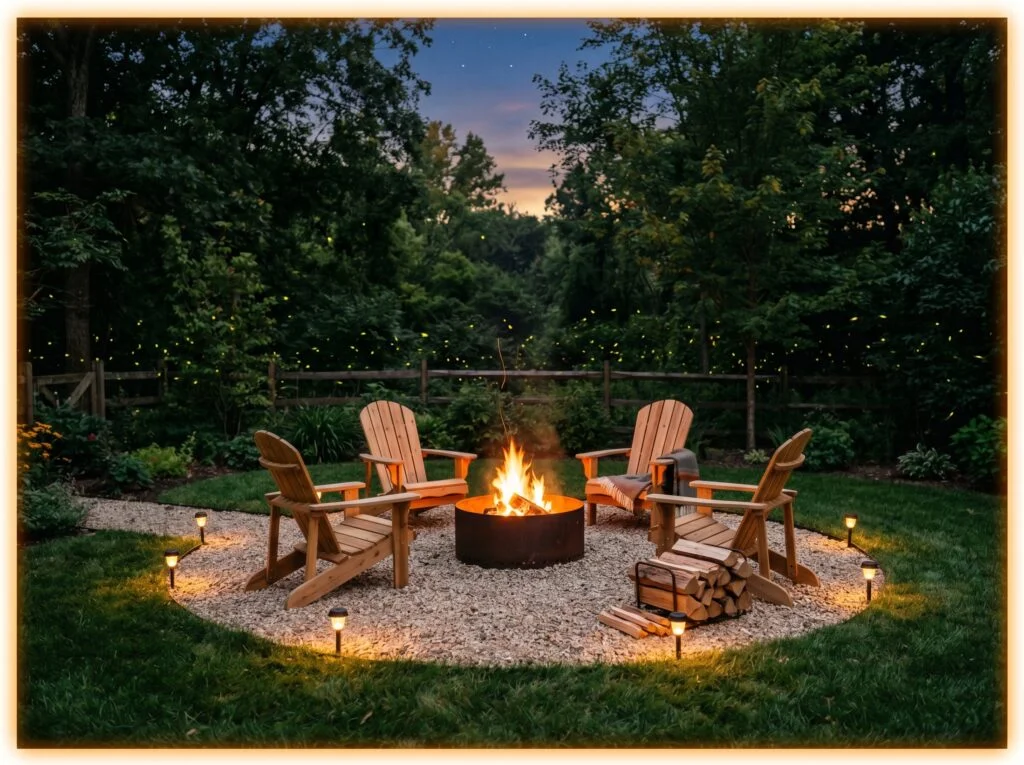
A fire pit is the backyard feature that makes every evening feel like an occasion. It creates a gathering point with a warmth and visual magnetism that no furniture arrangement, lighting scheme, or plant collection alone can replicate. The fire itself is the decoration everything around it simply provides the comfortable seating to enjoy it.
Place the fire pit at least 10 feet from any structure house wall, fence, or overhead pergola as a minimum safety distance. A 4-foot diameter gravel or paving stone base beneath and around the fire pit provides a non-combustible ground surface that prevents stray embers from reaching grass and contains ash debris in one defined zone.
For more inspiration on this feature, a gathering spot built around flame is worth exploring in more depth.
Hanging Outdoor Lanterns
Hanging outdoor lanterns add elegance and soft illumination to patios, pergolas, and garden areas. Their decorative designs create a welcoming atmosphere and enhance the charm of outdoor settings. These lanterns provide both functional lighting and aesthetic appeal.
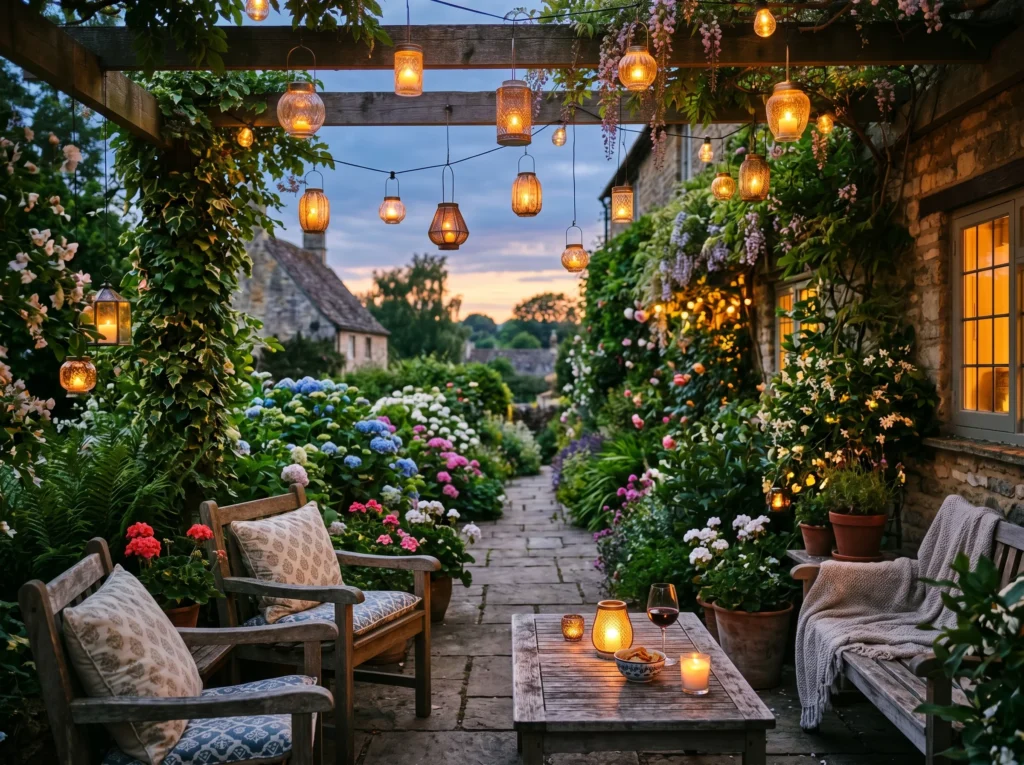
Hanging outdoor lanterns add a vertical lighting element that string lights alone don’t provide they create pooled glow at eye level and below, rather than overhead only, which layered with overhead string lights produces the most dimensional and atmospheric outdoor lighting possible.
Choose matte black or aged bronze lantern styles for the most versatile compatibility across different backyard aesthetics. Oversized lanterns (14 to 18 inches tall) make more visual impact at normal outdoor viewing distances than small lanterns that get lost against a large yard backdrop.
Raised Planter Box as a Garden Feature
A raised planter box introduces structure and visual interest to gardens and outdoor spaces. Elevated planting areas make gardening easier while showcasing flowers, herbs, or ornamental plants beautifully. This feature adds depth, organization, and natural beauty to the landscape.
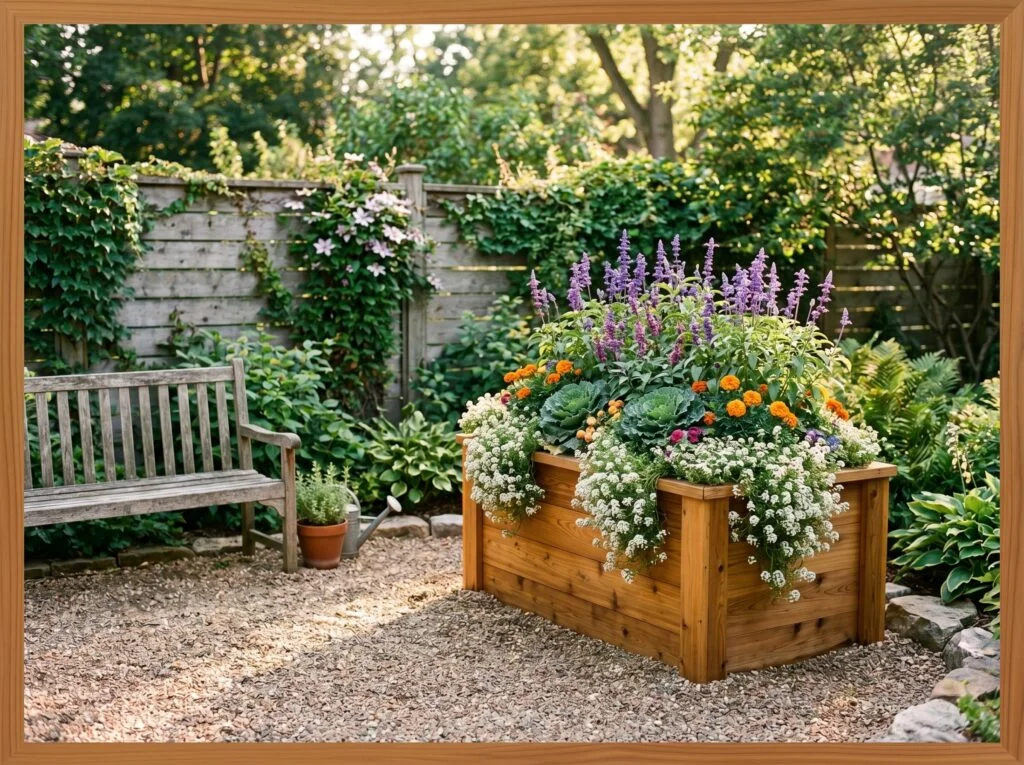
A raised planter box is the garden feature that does the most visible work for the least overall effort it elevates plants to a more visible and more accessible height, defines a specific garden zone with architectural structure, requires no bending or kneeling for maintenance, and fills with color and texture that a bare lawn section never provides.
Building a basic cedar raised planter is a genuine beginner DIY project four pieces of 2×8 or 2×10 cedar lumber, corner brackets, and deck screws are all you need for the simplest version. The total material cost for a 4×4-foot raised planter runs $60 to $120 in cedar lumber.
Outdoor Throw Pillows and Blanket Basket
Outdoor throw pillows and a blanket basket create a cozy and inviting seating environment. Soft textiles add comfort, color, and personality while making outdoor areas feel more like indoor living spaces. This simple addition enhances relaxation and encourages year-round enjoyment.
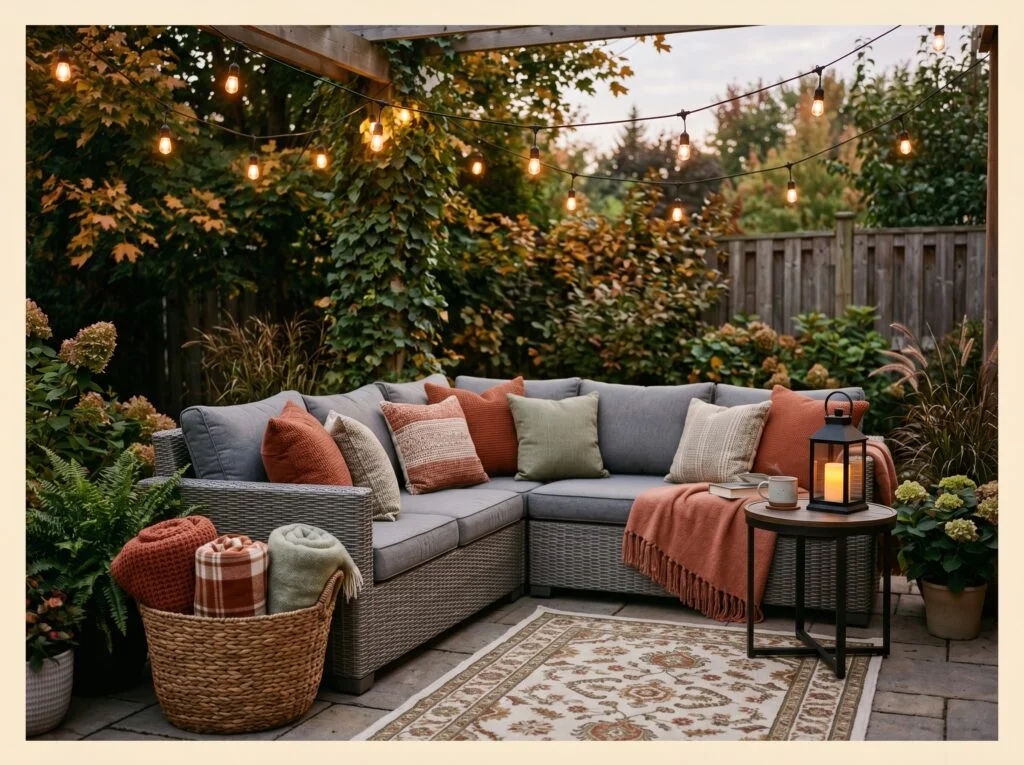
Throw pillows and a blanket basket are the quickest and most affordable styling upgrade for any existing outdoor furniture and they make a greater difference to how the space feels than almost any structural change. Good outdoor furniture with zero accessories looks like patio furniture.
Choose outdoor throw pillows made from solution-dyed acrylic or polyester performance fabric these resist moisture, mildew, and UV fading effectively. Fill the pillows generously (at least 20-ounce fill for a 20-inch square pillow) for a plump, luxurious appearance cheap, under-filled pillows look sad rather than cozy.
Pergola with Climbing Plants
A pergola with climbing plants creates a lush and romantic atmosphere in outdoor spaces. Vines and flowering plants soften the structure while providing natural shade and visual interest. This beautiful feature transforms patios and gardens into peaceful and elegant retreats.
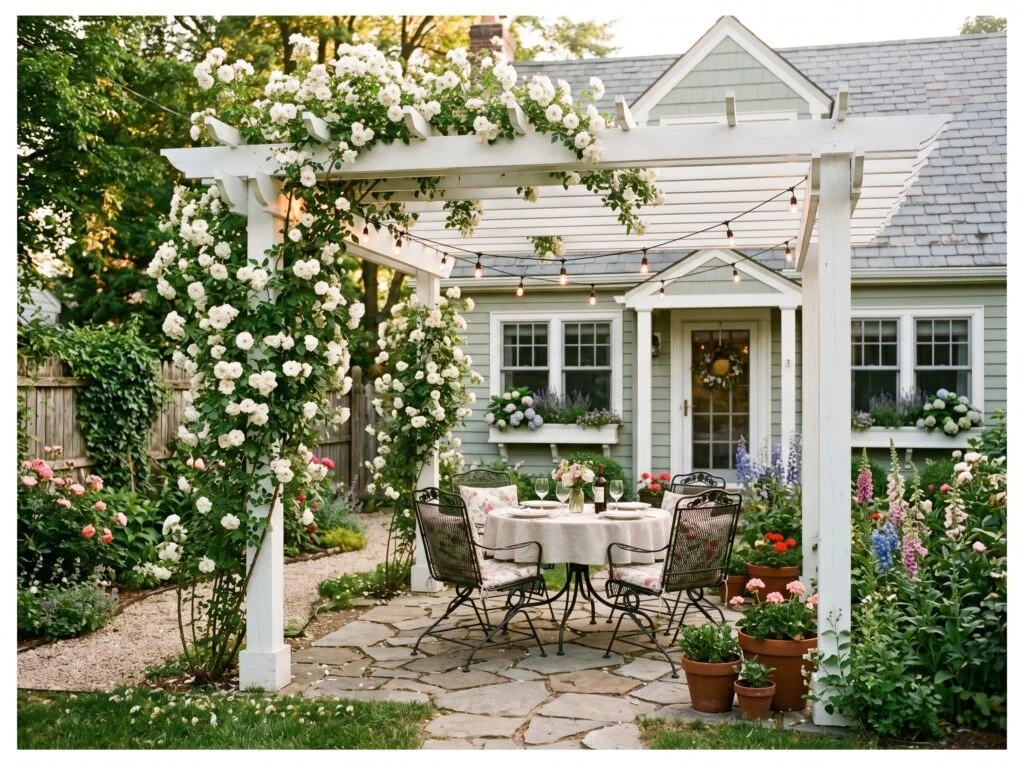
A simple four-post pergola over a patio area is one of the most transformative simple backyard decor additions because it creates an overhead structure that defines the patio as an outdoor room a space with both a floor (the patio surface) and a ceiling (the open timber rafters). Without an overhead element, even a beautifully furnished patio exists in formless open space.
Prefabricated cedar or pine pergola kits are available at home improvement stores for $600 to $2,500 depending on size and material quality they install with basic tools in one to two days. The 10×10-foot size accommodates a standard patio dining set with comfortable clearance on all sides.
If you’re weighing your options, overhead structures for defining the space can help you compare styles before building.
Outdoor Gallery Wall on a Fence
An outdoor gallery wall on a fence adds personality and artistic charm to backyard spaces. Decorative mirrors, metal art, and framed weather-resistant pieces create visual interest and transform plain fences into attractive focal points. This simple feature makes outdoor areas feel more curated and inviting.
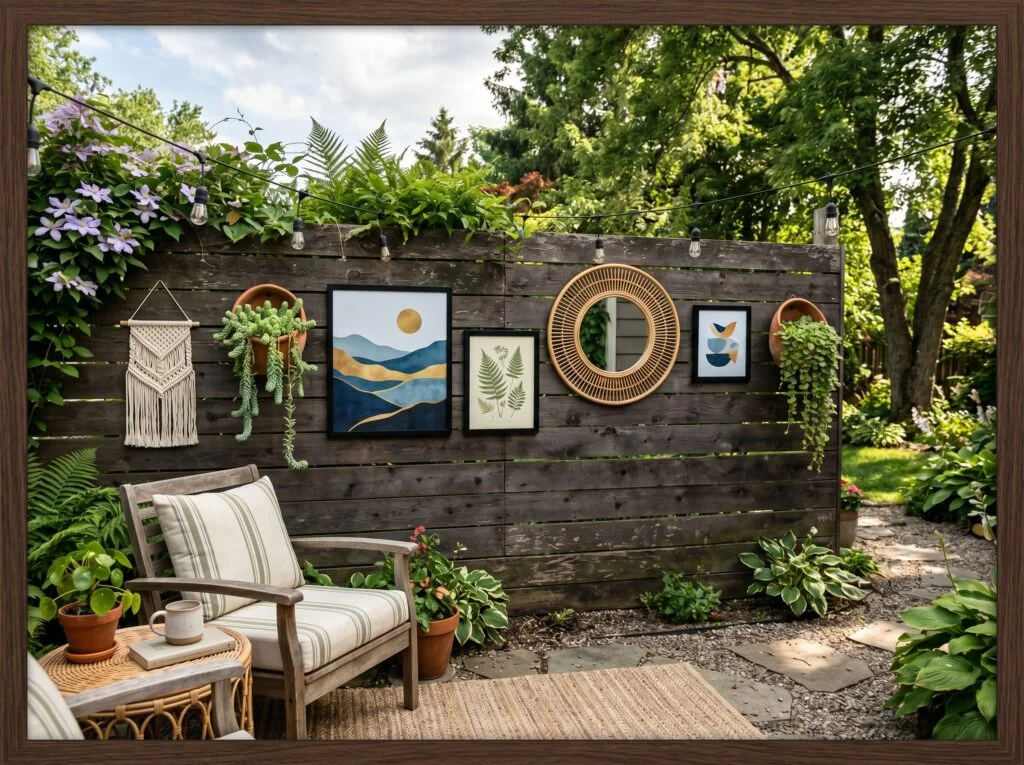
An outdoor gallery wall on a fence or exterior wall brings the design language of an interior living room directly into the backyard and that unexpected quality of finding a curated art display outdoors is exactly what makes it memorable.
Use only genuinely weather-resistant items for an outdoor wall display powder-coated metal prints, galvanized steel frames, resin or concrete wall art, and weather-treated macramé in UV-stabilized fiber. Standard interior framed prints will warp, swell, and deteriorate in one wet season regardless of how protected the fence position is.
DIY Pallet Wood Coffee Table
A DIY pallet wood coffee table provides an affordable and rustic addition to outdoor seating areas. The natural wood texture adds warmth while offering a practical surface for drinks and decorative accessories. This creative project enhances both functionality and farmhouse-style charm.
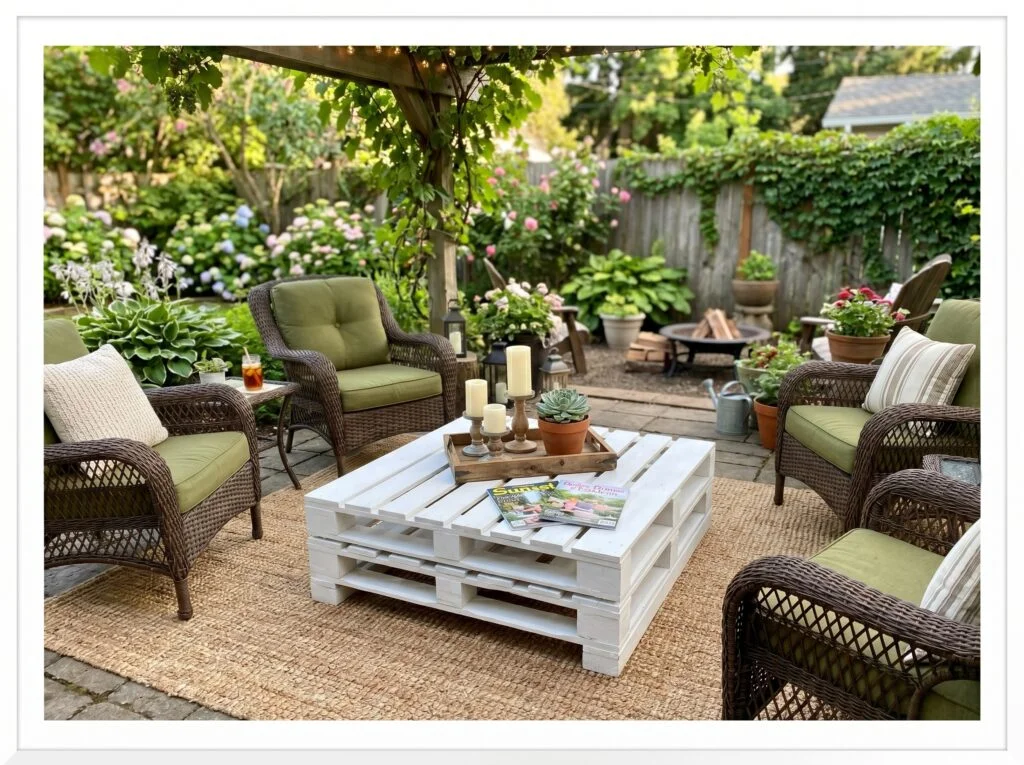
A DIY pallet coffee table is the most cost-effective centerpiece for an outdoor seating area two stacked and sanded shipping pallets create a surface at the right height for a seating arrangement, cost nothing if sourced from a hardware store or warehouse, and when painted and styled with a simple tray and a few accessories, look deliberately designed rather than obviously repurposed.
Sand all pallet surfaces thoroughly with 80-grit followed by 120-grit sandpaper to remove splinters and surface roughness before any painting. Fill large gaps with exterior wood filler and sand smooth.
Solar-Powered Fairy Lights in Garden Trees
Solar-powered fairy lights in garden trees create a magical and enchanting evening atmosphere. The delicate lights softly illuminate branches and add warmth to outdoor spaces without increasing energy costs. This charming feature instantly enhances the ambiance of gardens and patios.
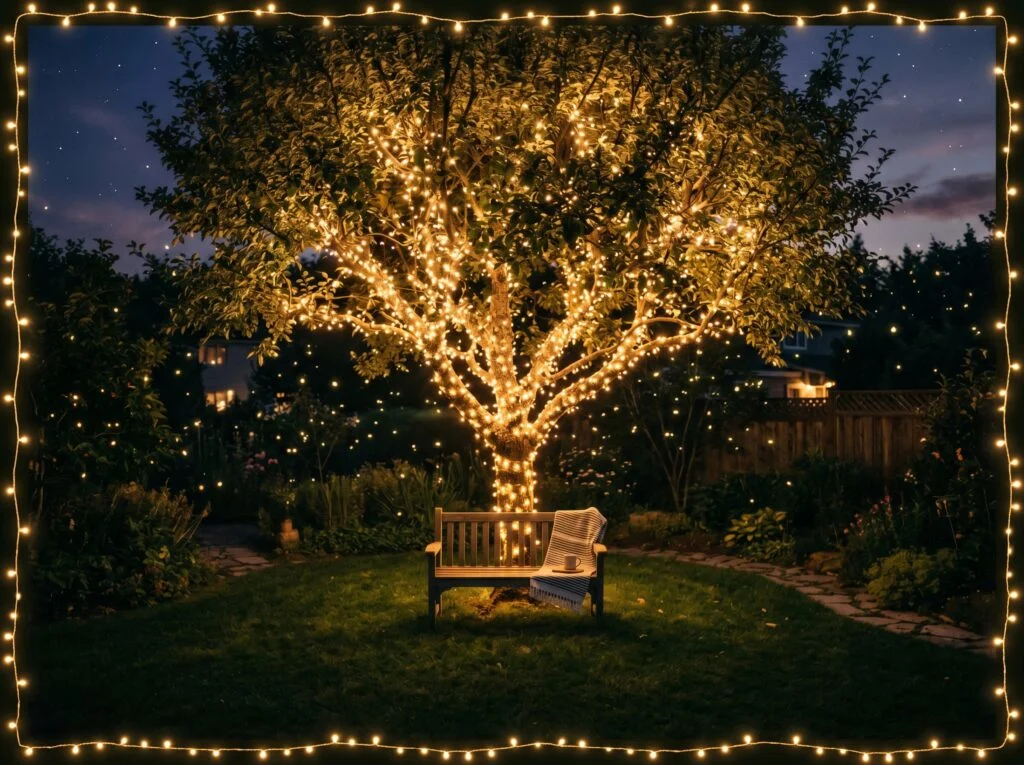
Wrapping solar fairy lights through the branches of a garden tree is one of the most enchanting and most effortless simple backyard decor ideas available it requires no tools, no wiring, no installation skills, and creates a result that genuinely looks magical in the evening.
Use solar-powered fairy lights with a panel attached to a 10-foot lead wire so the panel can be positioned in full sun while the lights wrap into a shaded tree canopy solar lights placed in shade charge poorly and produce dim, inconsistent results.
Outdoor Curtains for Shade and Privacy
Outdoor curtains provide both shade and privacy while adding softness and elegance to outdoor settings. The flowing fabric creates a resort-inspired atmosphere and helps define comfortable seating areas. This versatile addition improves both functionality and visual appeal.
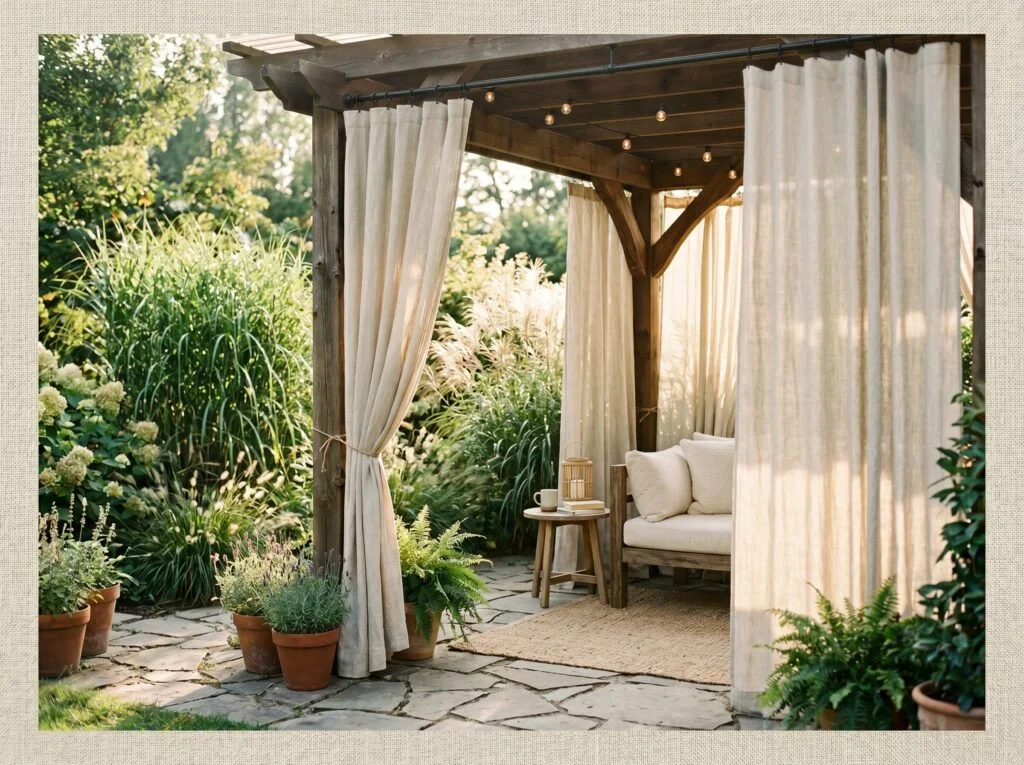
Outdoor curtains hanging from a pergola or a ceiling-mounted rod create the most instantly transformative simple backyard decor change available they turn an open patio into a private, draped outdoor room within minutes of installation.
Use solution-dyed acrylic or outdoor-rated canvas fabric for curtains in any position that receives regular rain or sustained direct sun. Standard sheer indoor curtains used outdoors will deteriorate, stiffen, and discolor within one season of full weather exposure.
For more ways to enclose the space, draping fabric that adds privacy pairs naturally with this kind of setup.
Gravel Pathway Between Lawn Zones
A gravel pathway between lawn zones adds structure and improves movement throughout the landscape. The textured surface creates visual separation while enhancing the overall design of the backyard. This simple feature brings both practicality and charm to outdoor spaces.
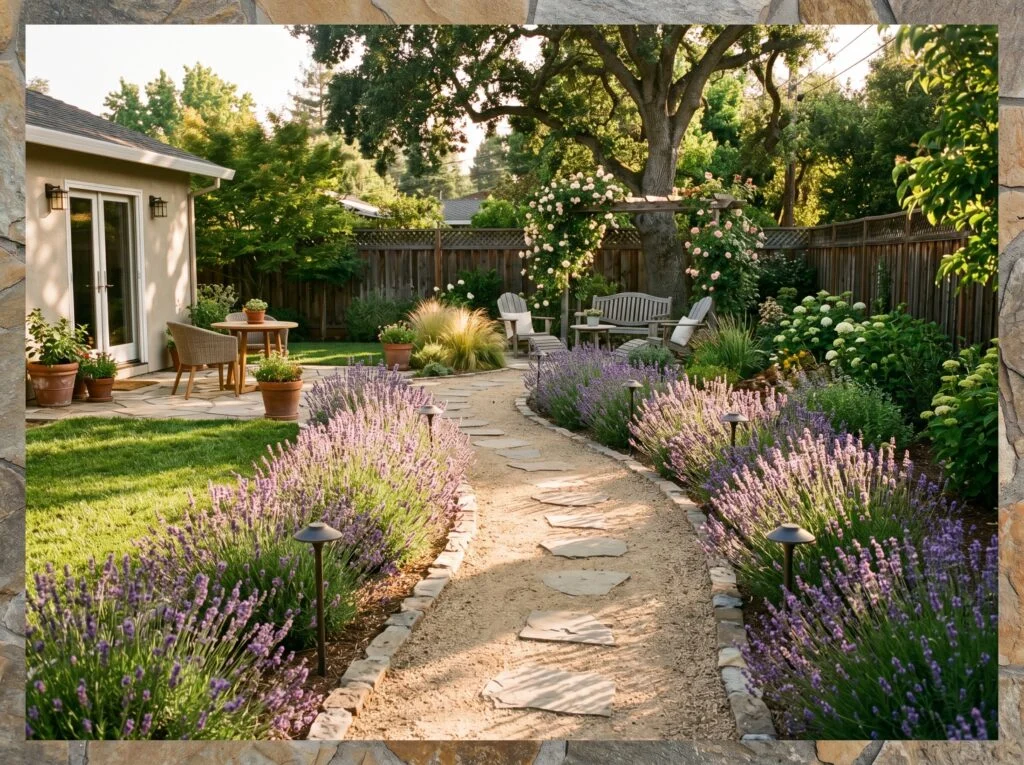
A simple gravel pathway connecting different zones of the backyard patio to fire pit, patio to garden bench, garden to back gate creates an immediate sense that the yard is organized and designed rather than just open space.
Mark the path outline with a garden hose before committing to the shape a gently curved path looks more natural and interesting than a perfectly straight line, and adjusting a hose takes seconds while adjusting already-laid gravel takes significantly longer.
Vertical Wall Planter for a Blank Fence
A vertical wall planter transforms a plain fence into a vibrant display of greenery and flowers. The layered planting arrangement adds depth, texture, and seasonal color without occupying valuable floor space. This feature creates a refreshing and visually appealing garden element.
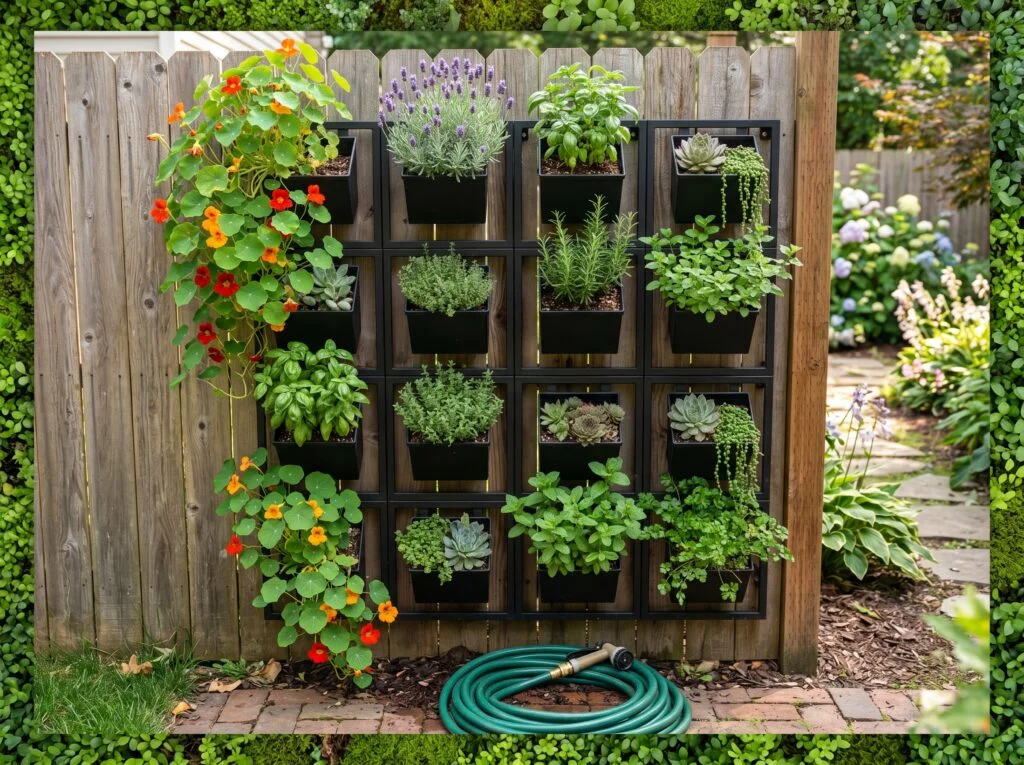
A vertical wall planter system mounted on a blank fence converts the most underused vertical surface in the backyard into a living garden feature. A grid of small individual wall-mounted planters spaced 12 inches apart in rows creates a living wall effect that brings color, texture, and biological richness to what was previously just wooden fence boards.
Choose plants based on the fence’s sun exposure south-facing fences in the northern hemisphere receive the most direct sun and suit drought-tolerant herbs (thyme, oregano, compact lavender) and succulents. East-facing fences receive gentler morning sun and suit calibrachoa, impatiens, and small ferns.
Hammock Between Two Trees
A hammock suspended between two trees creates a relaxing and peaceful outdoor retreat. The gentle swaying motion encourages rest and provides a comfortable place to enjoy nature. This simple addition instantly makes the backyard feel more inviting and serene.
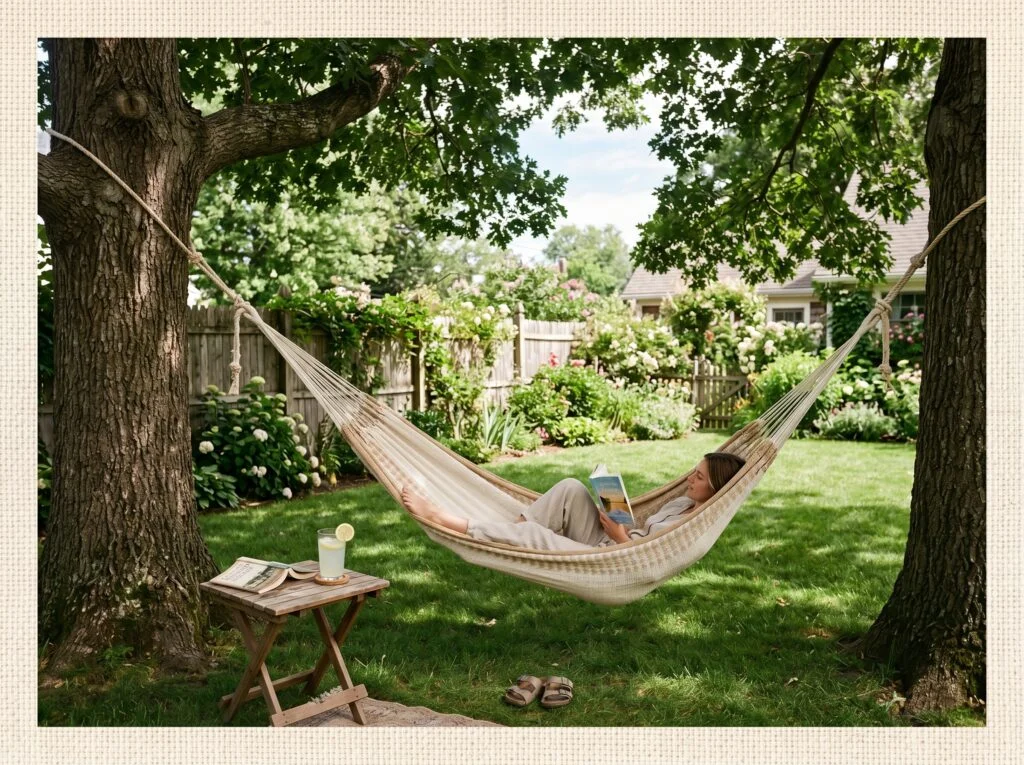
A hammock strung between two backyard trees is the single most evocative and aspirational simple backyard decor addition on this list it creates an immediate destination in the yard that signals relaxation, leisure, and a particular kind of unhurried summer living.
Use tree hammock straps rather than eye bolts or rope wrapped directly around tree trunks tree straps distribute the load across a wider band of bark, which prevents the grove damage that narrow rope or thin cord causes over time. Choose straps rated for at least 400 pounds (500 pounds with good safety margin) and a hammock hook system rated to the same specification.
Outdoor Bar Cart Setup
An outdoor bar cart setup adds convenience and style to patios and entertaining areas. The mobile design provides easy access to drinks, snacks, and decorative accessories during gatherings. This feature creates a sophisticated and functional entertaining space.
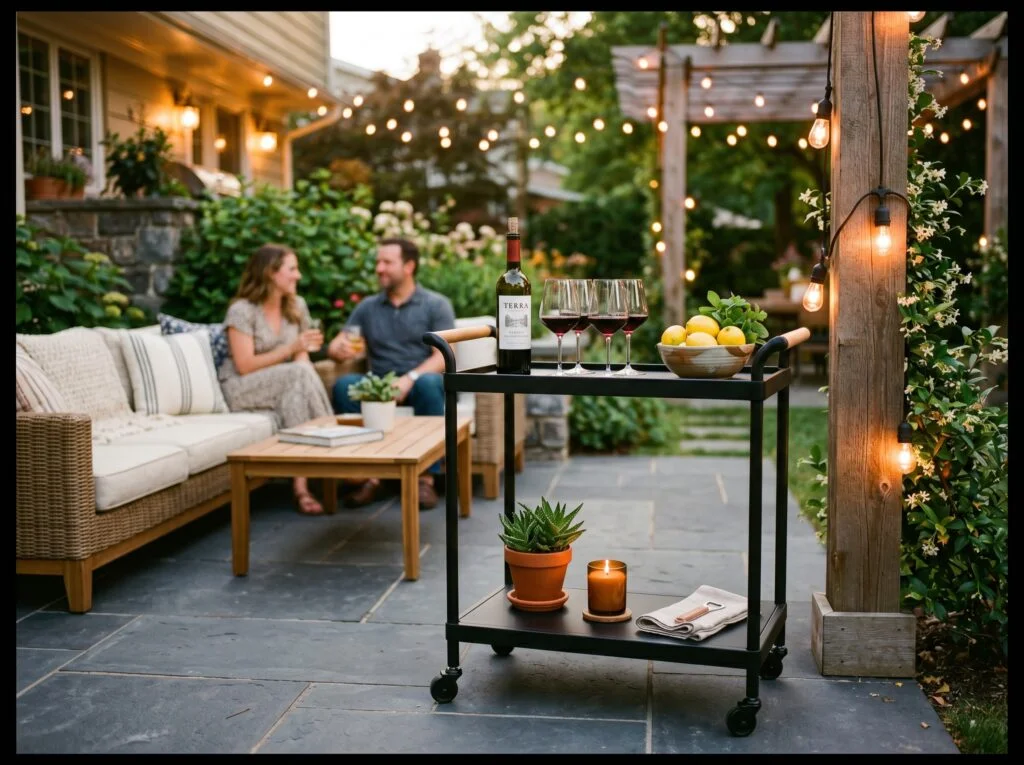
An outdoor bar cart is the functional decor piece that makes backyard entertaining feel genuinely effortless it gives drinks, glasses, a small snack arrangement, and serving accessories a dedicated outdoor home that eliminates the constant in-and-out trips to the kitchen that break the flow of outdoor gatherings.
Choose a cart in a finish that coordinates with your chosen backyard style matte black for modern farmhouse or contemporary, antique gold or aged brass for boho or cottage, satin stainless for clean contemporary. Powder-coated steel and weather-resistant aluminum are both excellent outdoor-rated frame materials.
If entertaining is part of your plan, a drink station for effortless hosting can make gatherings feel more seamless.
Potted Herb Garden on the Patio Edge
A potted herb garden along the patio edge combines beauty with practicality in outdoor spaces. Fresh herbs add greenery, fragrance, and convenient ingredients for cooking and entertaining. This arrangement creates a charming and productive garden feature.
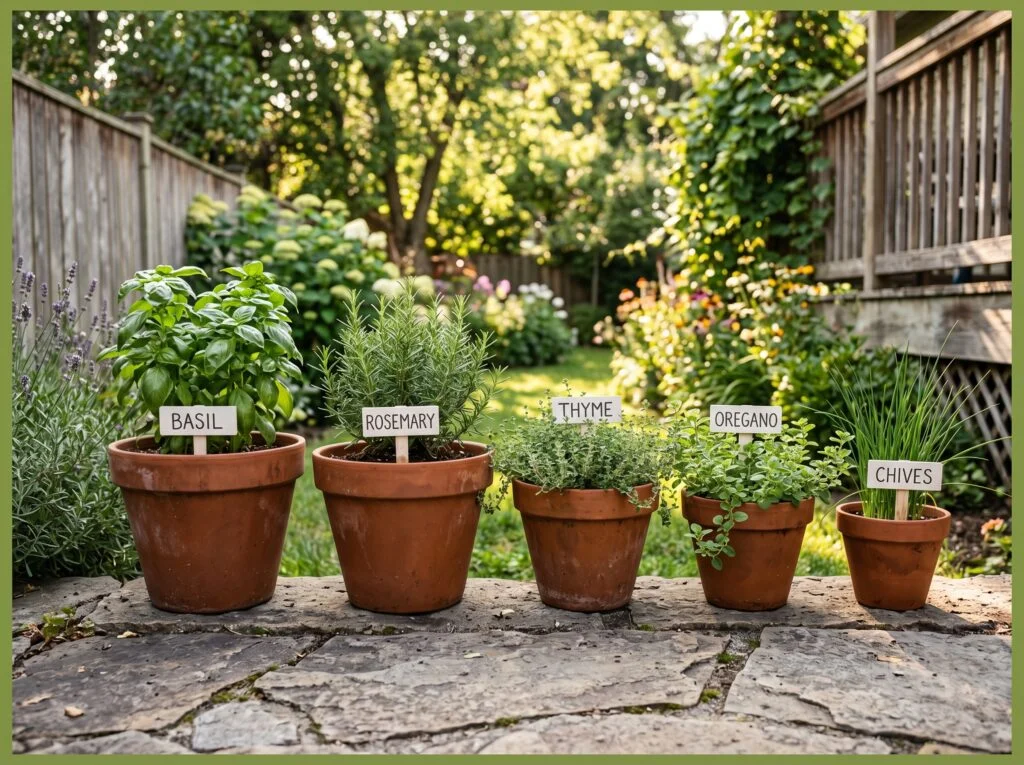
A potted herb garden along the patio edge is the rare backyard decor element that’s simultaneously beautiful, fragrant, and genuinely useful.
Place the herb pots where they receive at least 6 hours of direct sun per day most culinary herbs are full-sun plants that produce their best flavor and most vigorous growth in maximum sun exposure. Position the pots close to the kitchen door or the outdoor cooking area for maximum harvest convenience the shorter the path between the herb pot and the cutting board, the more frequently the herbs get used.
Simple Outdoor Dining Table Setup
A simple outdoor dining table setup creates a welcoming environment for meals and gatherings. Comfortable seating and minimal décor make the space feel relaxed and functional. This arrangement encourages outdoor dining and enhances the usability of the backyard.
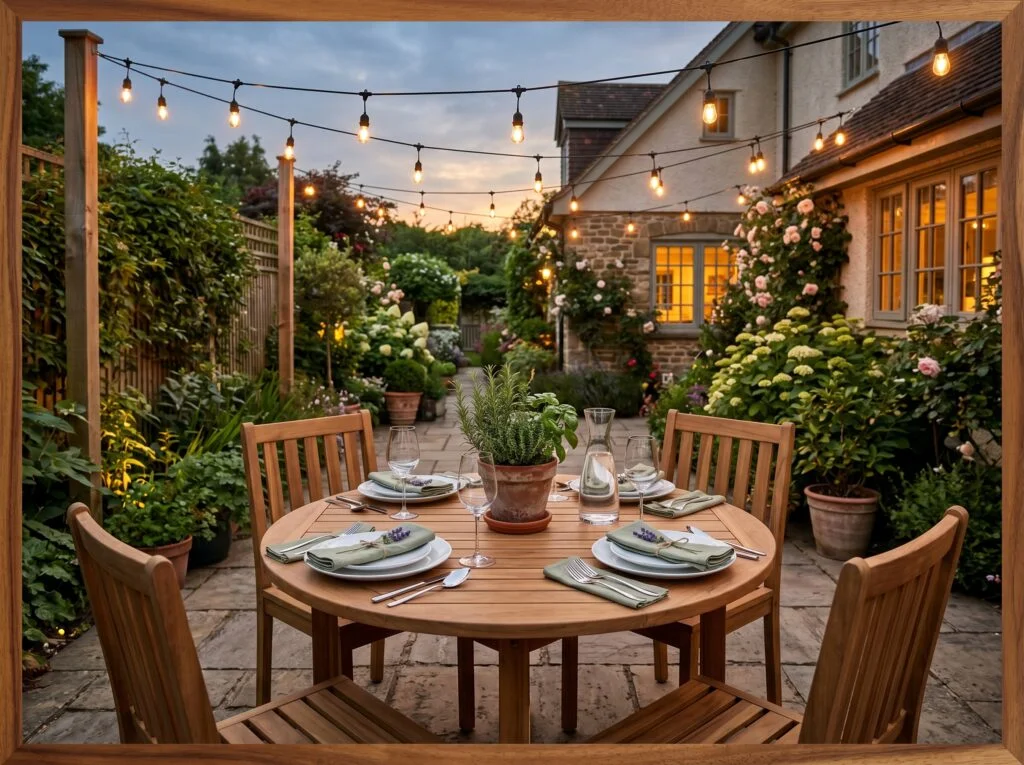
A properly sized and simply styled outdoor dining table is the backyard decor element that most consistently elevates how a family uses their outdoor space it creates a specific reason to eat outside rather than defaulting to indoor dining, which is the habit that keeps most backyards underused.
Choose a round table over rectangular for a small patio round tables seat the same number but without corner obstructions that limit seating flexibility and conversation flow. Acacia wood is the best value outdoor wood furniture material harder than teak, significantly cheaper, and beautiful with annual oiling maintenance.
Upcycled Pots and Vintage Containers as Planters
Upcycled pots and vintage containers add character and creativity to garden displays. Repurposed items introduce unique textures and nostalgic charm while supporting sustainable decorating ideas. This approach creates personalized and visually interesting planting arrangements.
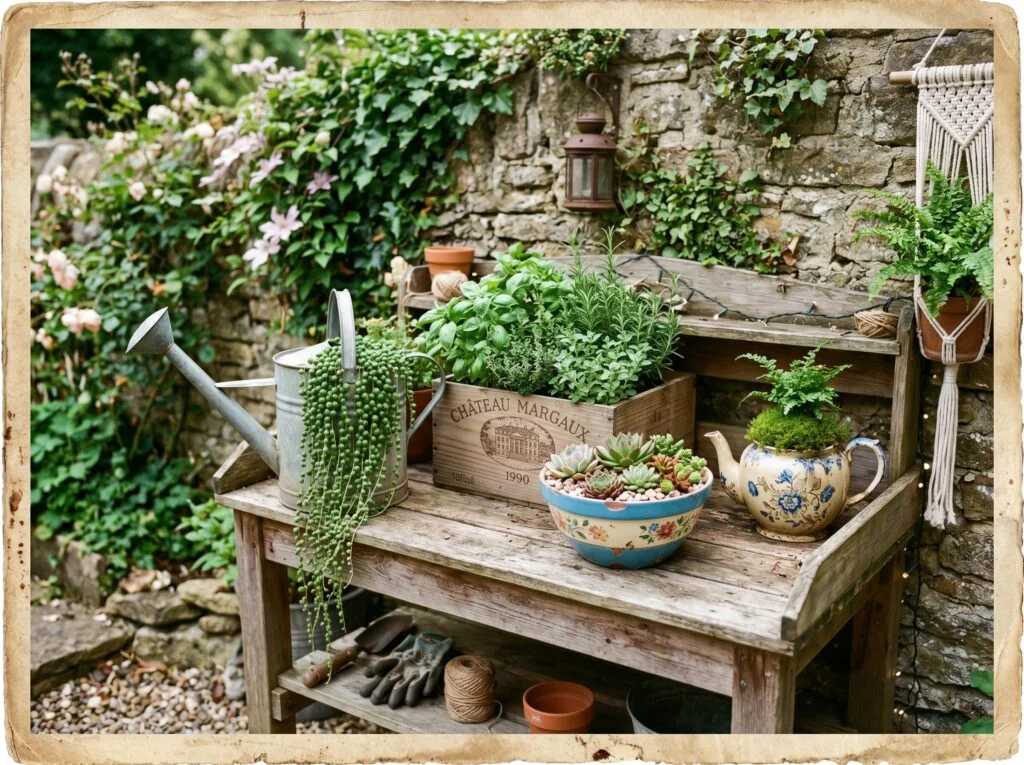
Upcycled containers as garden planters are the most personal and most cost-effective planting approach in simple backyard decor they turn objects with history and character into garden features that no mass-produced planter can replicate.
The only planting requirement for any container is drainage drill a drainage hole in the base of any watertight container before planting to prevent waterlogged roots. A 3/8-inch drill bit handles most metal and ceramic containers effectively.
Seasonal Backyard Decor Refresh Strategy
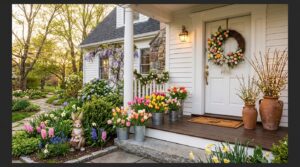
A seasonal backyard decor refresh strategy keeps outdoor spaces feeling fresh and inviting throughout the year. Changing cushions, flowers, lanterns, and decorative accents allows the space to reflect each season’s character. This simple approach maintains visual interest and enhances outdoor enjoyment.
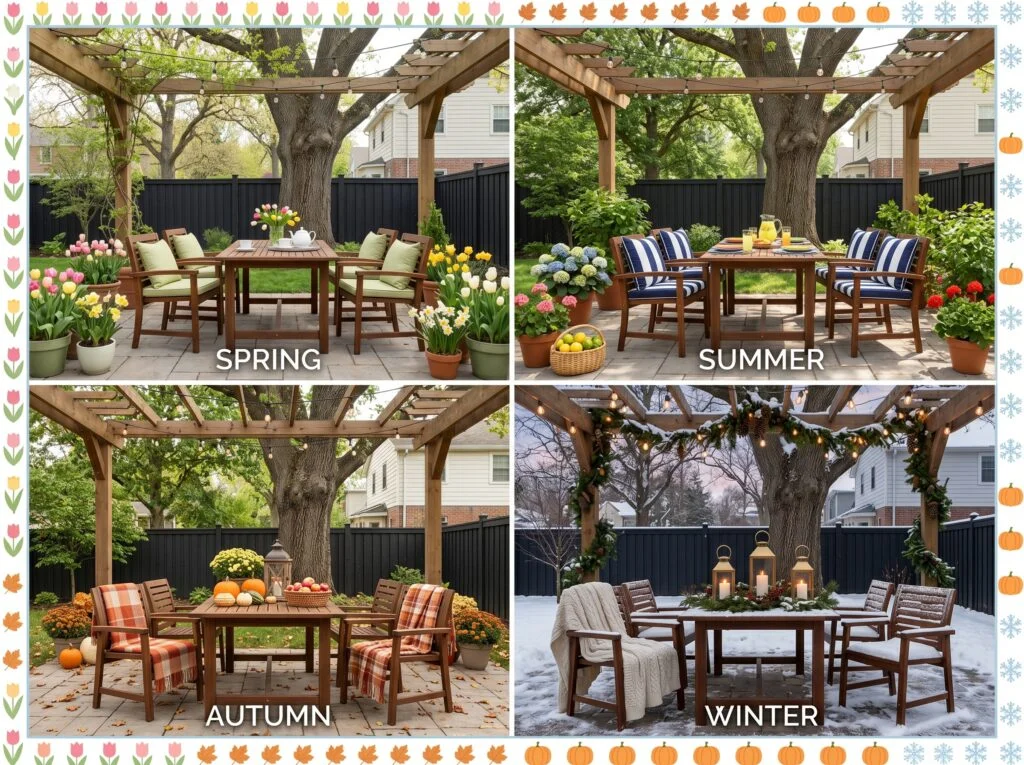
A seasonal decor refresh strategy is the approach that keeps a backyard feeling alive and deliberately tended throughout the entire year and it’s the concept most simple backyard decor articles completely ignore. The permanent elements of the backyard (furniture, string lights, fire pit, privacy screen) stay constant year-round.
Spring: swap in lighter cushion covers in sage green or pale blue, fill pots with tulips, hyacinths, or pansies, and add a simple floral wreath to the fence or gate. Summer: bring out the brightest cushions and textiles, fill pots with petunias and zinnias, and add citrus accents (real lemons in a bowl, lemon-print outdoor textiles) for freshness.
Small Backyard Decor Strategy: Making Less Feel Like More
A small backyard decor strategy focuses on thoughtful design choices that maximize both function and visual impact. Layered lighting, multifunctional furniture, and carefully selected accessories help create a spacious and cohesive appearance. This approach makes compact outdoor areas feel stylish, comfortable, and intentionally designed.
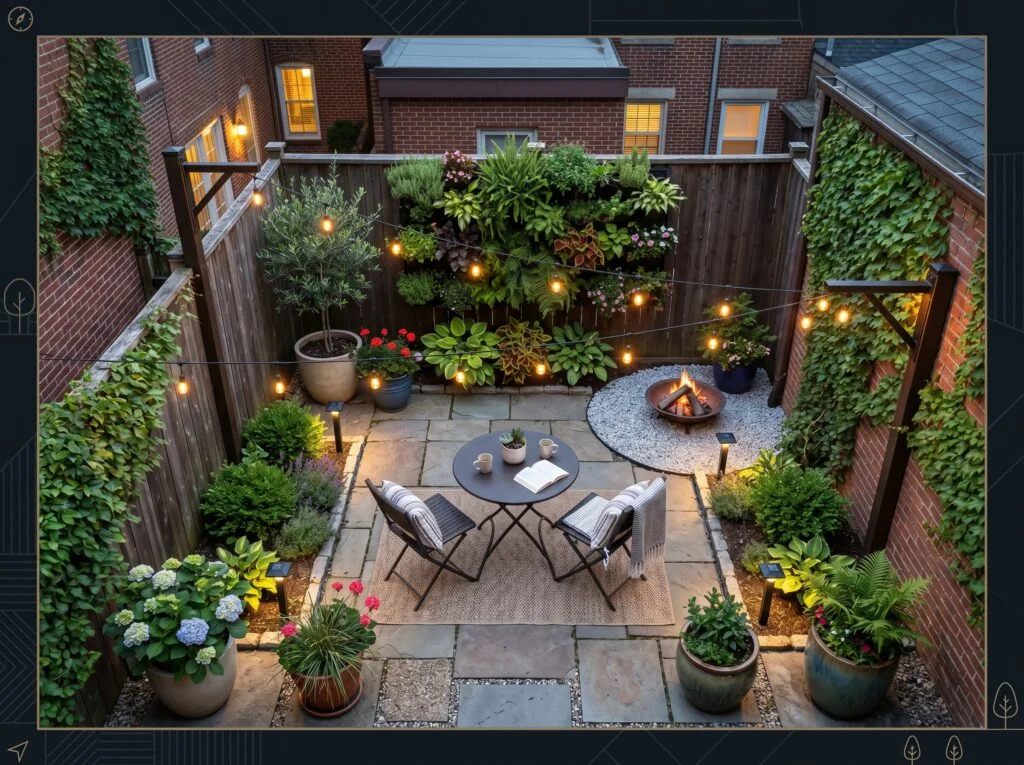
A small backyard requires a completely different decor strategy than a large yard and most inspiration content showing large, open spaces is genuinely unhelpful for people working with compact urban yards, narrow side yards, or small townhouse outdoor areas.
Vertical is the small backyard’s greatest ally. A vertical wall planter on the back fence, a tall narrow trellis with a climbing plant, and hanging string lights overhead all add interest and richness without consuming any floor space.
Conclusion
A beautiful backyard doesn’t require a landscape architect, a large budget, or a complete overhaul. It requires a clear style direction, a handful of well-executed ideas, and the willingness to start with one change rather than waiting until you can do everything at once.
Pick the two ideas from this list that solve your backyard’s most obvious current limitation.
Each improvement makes the next one feel more worthwhile and more visible. Build the backyard one good decision at a time and it develops the character and warmth of a space that was genuinely designed not just filled with things, but composed with intention.
From there, a backyard that feels fully finished comes together as each small decision builds on the last.